SAT-QCT Pressure Safety Valves Containerized Testing and Repair Workshop
Welcome to SAT-QCT Safety Valve Testing and Calibration. Our advanced containerized solutions provide precise pressure testing, calibration, and repair services for safety valves, ensuring reliability and efficiency in critical systems.
SAT-QCT Safety Valve Testing: Delivery List
| S/N | Name | Model | Quantity |
|---|---|---|---|
| 1 | Container | 20GP | 1 piece |
| 2 | Safety Valve Pressure Calibration Test Bench | GGS-SAT-QCT | 1 unit |
| 3 | Safety Valve Calibration Computer System | 1 set | |
| 4 | Safety Valve Seal Grinding Tool | GGS-YXJ | 1 set |
| 5 | High-pressure Gas Source Machine | NRW150-GSX | 1 unit |
| 6 | Cantilever Crane | 0.5T, 1.2M | 1 set |
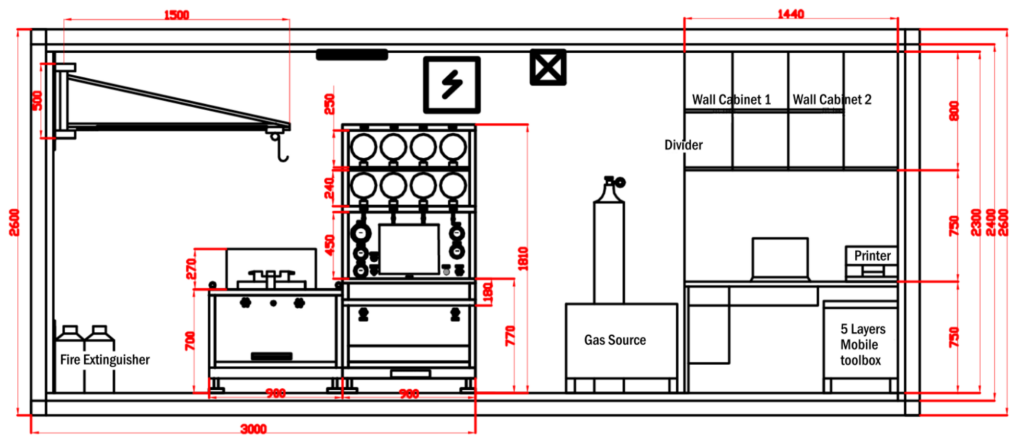
Schematic diagram of the product
Safety Valve Pressure Calibration Test Bench
6000 mm
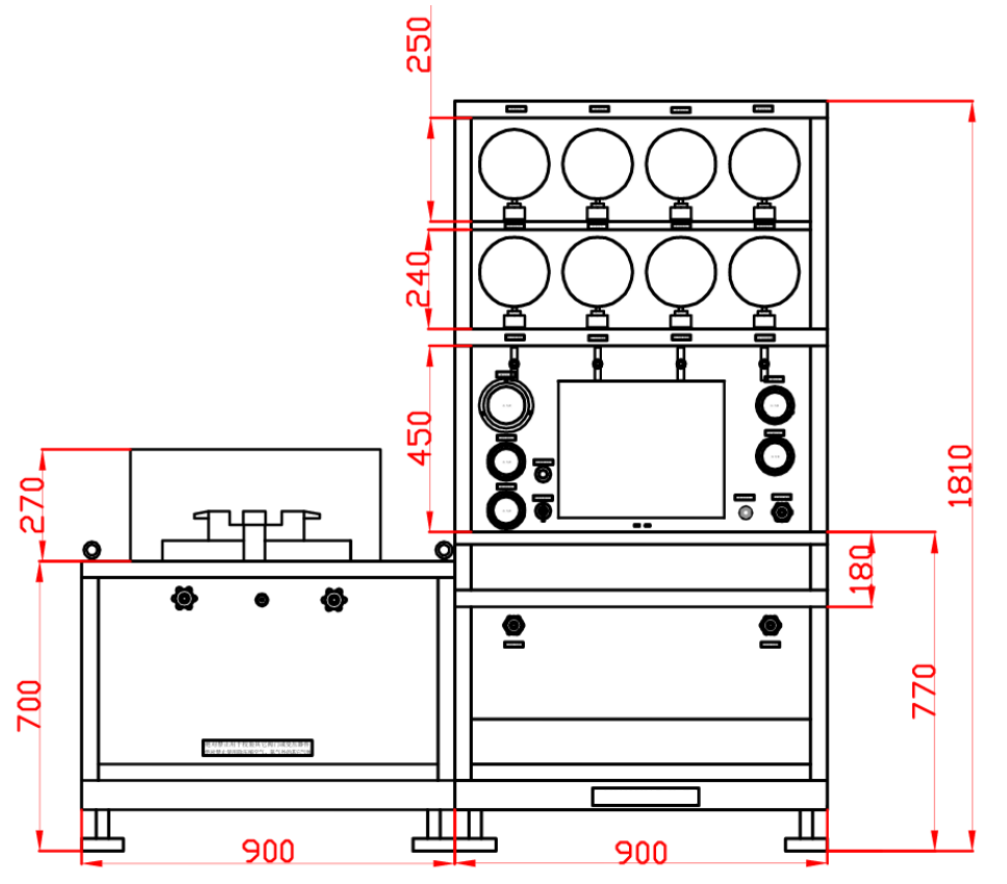
SAT-QCT Safety Valve Testing: Technical Specification
A. Container
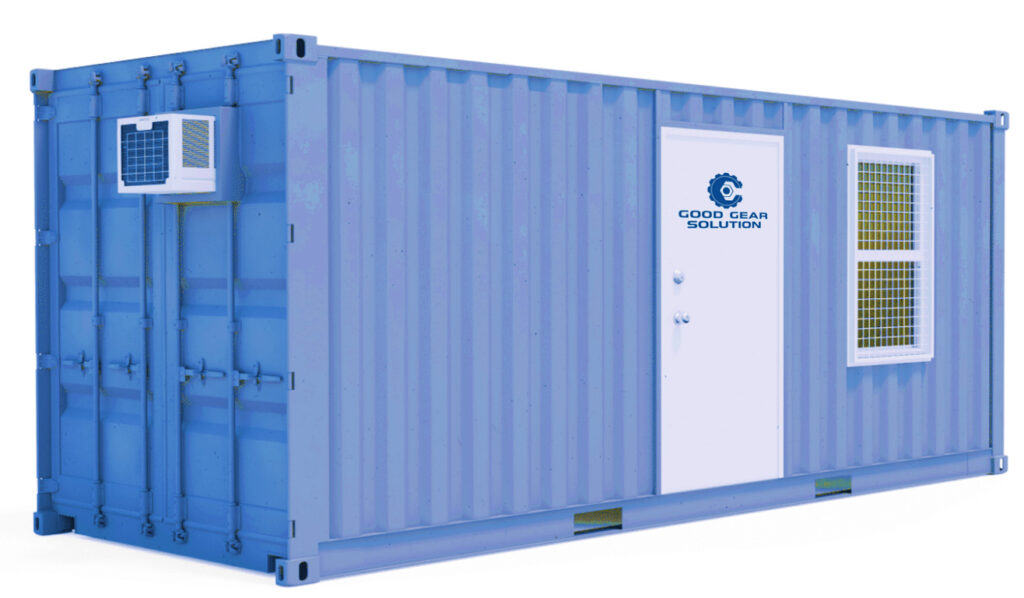
| 1 | 20GP container (6 meters long, 44 meters wide, 2.6 meters highstandard sea container), provided with ICSB container certificate (sea and cargo suitability certificate, for the booking company to use the warehouse position). |
| 2 | Estimated weight 4 Metric Ton |
| 3 | The interior of the container is insulated with 50mm thick rock wool insulation panels, five sides insulated. |
| 4 | The floor of the container is laid with steel checkered anti-slip plates. |
| 5 | The container is equipped with electric wiring, lighting, power strips, and fire extinguishers. |
| 6 | Two hanging cabinets are installed. |
| 7 | Equipped with office desk and chair set. |
| 8 | Equipped with workbench (with one bench vice) |
| 9 | Equipped with Green 1.5P air conditioner. |
| 10 | Equipped with common toolboxes and calibration maintenance tools. |
B. SAT-QCT Safety Valve Pressure Calibration Platform
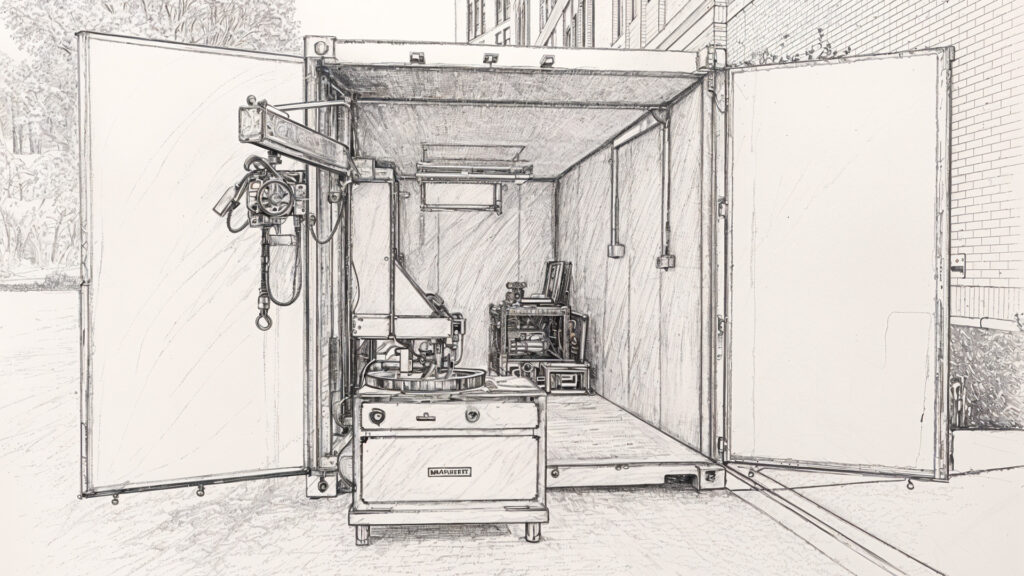
| 1. This equipment is designed as a container-style calibration room, arranged with: a. A cantilever crane, b. Safety valve calibration platform, c. Gas source machine, d. Grinding and maintenance tools. |
| 2. The safety valve calibration platform can either seamlessly dock inside the container or have its clamping seat moved outside for use. |
| 3. Both the equipment box and piping are made of stainless steel. |
| 4. Technical Parameter: |
| a | Maximum calibration diameter range | DN 300mm |
| b | Maximum calibration pressure | Gas 40 MPa, liquid 70 MPaDual-purpose structure for gas and liquid, with a built-in gas booster to increase medium-pressure gas to high-pressure directly, and an external manual pressure test pump. |
| c | Calibration accuracy | ±0.4% |
| d | Mediums used | Nitrogen, clean compressed air or clean water |
| 5. Clamping pressure of the lower clamp for various diameters is adjustable under the corresponding maximum calibration pressures: |

Take note
~ This equipment has an adjustable clamping force structure and must be adjusted according to the diameter and opening pressure of the calibrated safety valve during SAT-QCT Safety Valve Testing. Otherwise, excessive clamping pressure can damage the safety valve being calibrated, potentially causing accidents.
~ Insufficient clamping pressure might not meet the sealing requirements during SAT-QCT Safety Valve Testing.
~ Refer to the detailed table above for correct settings.
~ This equipment is not suitable for calibrating other types of valves.
SAT-QCT Safety Valve Testing
Equipment Features
| 1. Dual-purpose structure for gas and liquid, with a built-in gas booster to increase medium-pressure gas to high-pressure directly, and an external manual pressure test pump. |
| 2. Precision gauges with easy-to-remove quick-turn structure. The front panel of the gauge uses transparent acrylic for easy inspection and maintenance. |
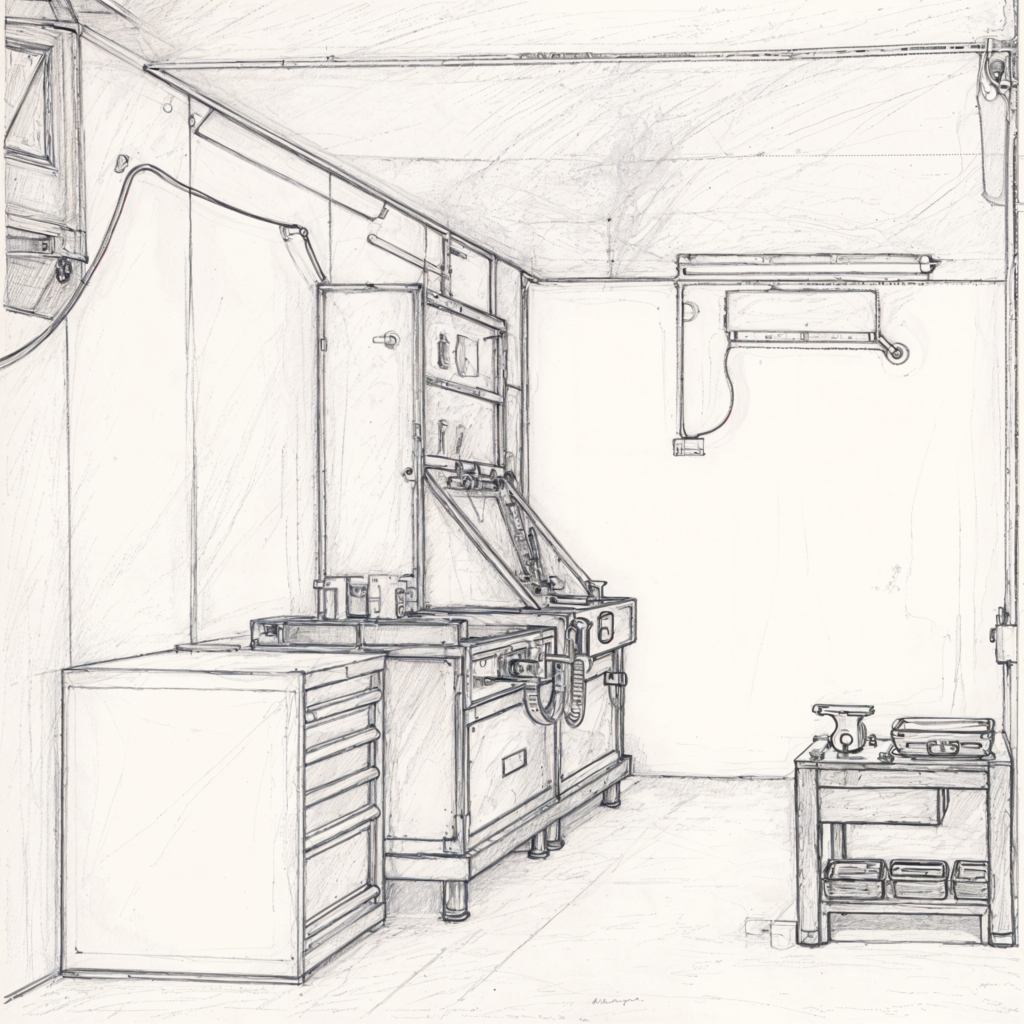
| 3. Clamping station is on the left side of the control console, with a split design for seamless connection. The calibration platform’s front and side panels are designed to be removable for easy maintenance. |
| 4. Seamless connection between clamping station and control console, connected by high-pressure hoses (one with M16×1.5 ends, four with M20×1.5 ends, all withstanding 60MPa pressure), including one 6mm low-pressure hose, all 1m long. An additional 3m spare connection hose set is provided for using the clamping seat outside the container. |
| 5. Equipment fixed inside the container. Clamping station equipped with lifting rings for both internal seamless connection and external calibration use. |
| 6. High-visibility, explosion-proof safety shield installed between the control box and clamping seat. |
| 7. Dual gauge display with a four-stage precision pressure gauge switching mechanism based on calibration pressure. |
| 8. Equipped with a safety valve with an automatic overpressure protection device for the clamping mechanism. |
| 9. Responsible for integrating and installing the safety valve calibration platform within the container, completing relevant equipment connections and functionality debugging. |
| S/N | Part Description | Specification |
|---|---|---|
| 1 | Equipment Body | SAT-QCT model (including control box + clamping seat) |
| 2 | Clamping Foot | New forged bidirectional clamping foot |
| 3 | Gas Booster (installed within equipment) | 1 unit |
| 4 | Precision Pressure Gauge (calibrated) | 0-1.6MPa, 0-4MPa, 0-16MPa, 0-100MPa |
| 5 | Centre Pad | DN 20, 25, 32, 40, 50, 65, 80, 100, 150, 200, 250, 300 |
| 6 | ‘O’ Ring Seals | Various specifications |
| 8 | Gas Source Connection Hose | M20×1.5, M16×1.5 L = 2 meters |
| 9 | Control Box to Clamping Seat Connection Hose | Two ends M16×1.5 (1 piece), two ends M20×1.5 (4 pieces), φ6mm hose (1 piece), L=1 meter |
| 10 | Control Box to Clamping Seat Connection Hose | Two ends M16×1.5 (1 piece), two ends M20×1.5 (4 pieces), φ6mm hose (1 piece), L=3 meters |
| 11 | British Thread Seat | ZG 1/2″, 3/4″, 1″, 1 1/4″, 1 1/2″, 2″, 2 1/2″ |
| 12 | Metric Thread Seat | M27×1.5, M30×1.5, M33×1.5 |
| 13 | Transition Pad (blue) | 1 piece |
| 14 | Spare Clamping Switch | Two-position five-way |
| 15 | Spare Reset Switch | Two-position three-way |
| 16 | Spare Drive Switch | Two-position three-way (large) |
| 17 | Safety Explosion-proof Baffle | Custom |
| 18 | Sealing Number Bubble Device | SM-200 |
| 19 | Manual Pressure Test Pump | S-SY5/80 |
| 20 | Aluminium Tool Box | 1 piece |
| 21 | User Manual | 1 book |
| 22 | Calibration Platform Certificate | 1 copy |
SAT-QCT Safety Valve Testing
Equipment Configuration

3.1 Safety Valve Calibration Intelligent Digital Management System.
| S/N | Name | model |
|---|---|---|
| 1 | Software | Safety Valve Information Entry SoftwareSafety Valve Calibration Station Server SoftwareSafety Valve Calibration Platform Calibration SoftwareMicrosoft SQL Server 2008 Express Database |
| 2 | Hardware | 1. Industrial All-in-One Machine (with genuine Windows 10 system). 2. Intelligent Data Acquisition Module 3. Multi-range Pressure Sensors |
SAT-QCT Safety Valve Testing: Software Function
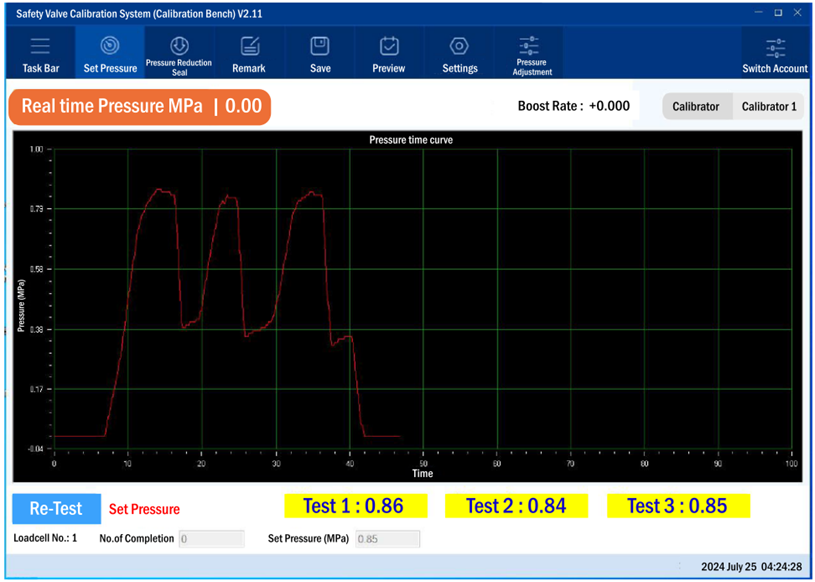
A.Calibration Software
For calibration equipment:
- Automatically records safety valve opening pressure, sealing test pressure drop, and other critical data.
- Provides real-time display of the pressure curve and records the set pressure curve.
- Displays the pressurization rate during calibration to ensure accurate data by preventing rapid pressurization.
- Automatically calculates the sealing test pressure.
- Can export marking machine files, enabling one-click marking when equipped.
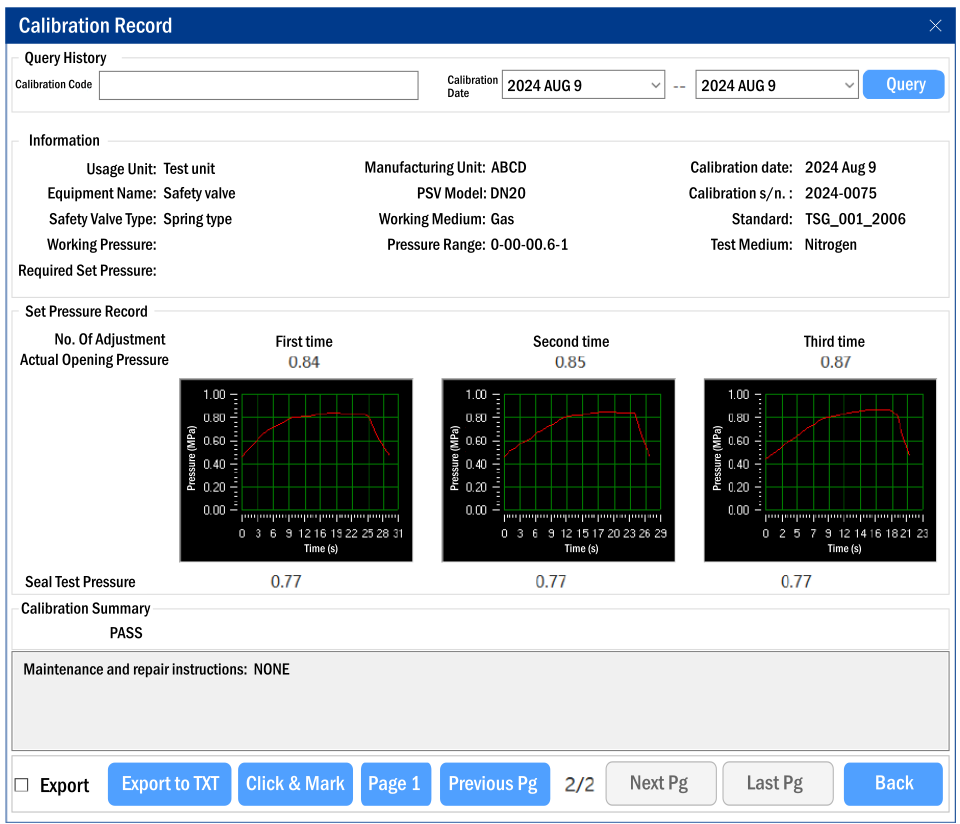
B.Management Software Calibration Software
For office or front desk:
- Supports importing safety valve information, allowing clients to import data into the management software after filling out the order form.
- For recorded safety valves, calibration can be retrieved and recalibrated with one click based on the calibration number, reducing workload.
- Can export electronic forms of order forms, calibration reports, calibration records, and ledgers, with support for batch printing.
- Calibration reports and records support printing electronic signatures.
- Calibration reports and records support printing calibration curves.
- Calibration reports and records formats can be freely adjusted by the user.
- Provides workload statistics, enabling administrators to view the workload of each calibration personnel.
After Sales Service
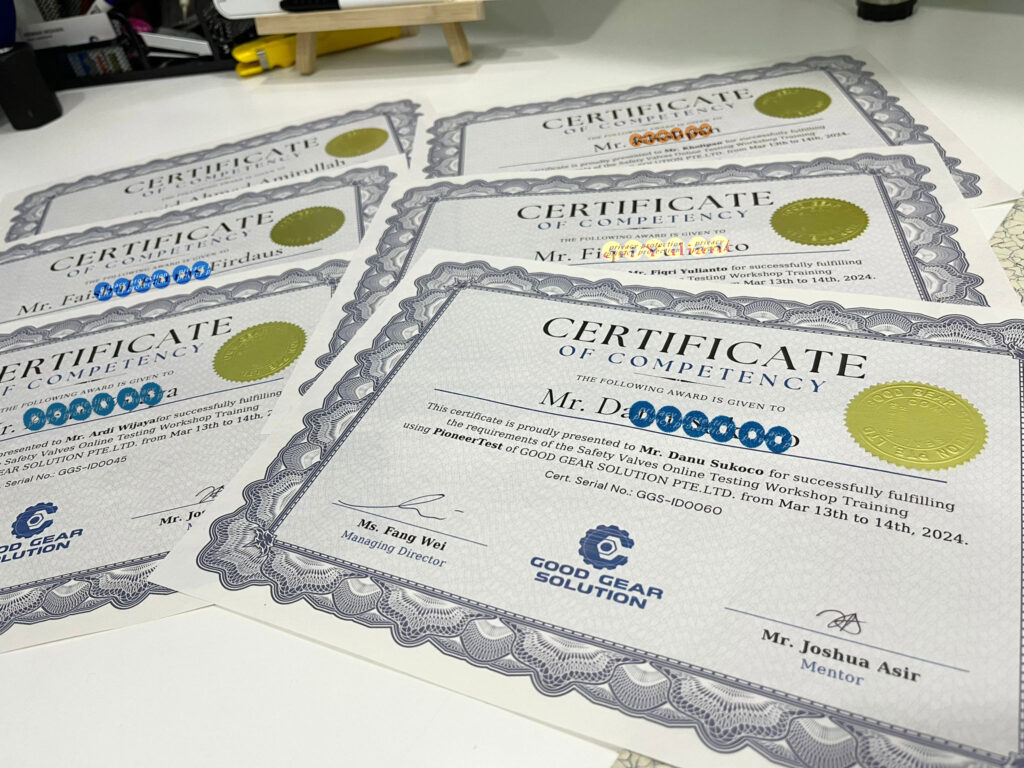
- Operational Training:
- SG Workshop: A 2-day operational training session at our Singapore workshop is included.
- Onsite Training: If onsite training is required, it will be a 3-day session. The basic training cost is USD 1,500 per day, per trainer. A separate invoice will be issued to the Buyer.
- Note: Airfares, accommodation, meals, airport pick-up, and local transportation are to be provided by the Buyer.
- Warranty:
- The warranty period for the valve testing bench is 12 months.
- Post-Warranty Services:
- After the warranty period, paid services will be available, including the provision of spare parts.
Learn more about Safety Valve Test.
